
Welcome to the Creatin' With Kirsteen stop on the February Stampin Friends Blog Hop!
The theme this month is 'Black, white and whatever you like'.
The theme this month is 'Black, white and whatever you like'.
Weren't Melissa's projects awesome? You can navigate back to her blog using the 'Previous' button - but the hop does go in a loop and you can also continue on to Cindy's blog by clicking on the 'Next' button at the bottom of the page.
We do have 3 guest bloggers this month - and you won't want to miss their projects. They are:
I always find this challenge/theme a hard one...I rarely use black apart from ink colour for sentiments and outlines!
However this year I found inspiration when I was looking up some information on my daughter's school website-she attends SCAD and their mascot is the bee!
So I thought 'let's use yellow with black and white'....but then flowers? Bees?
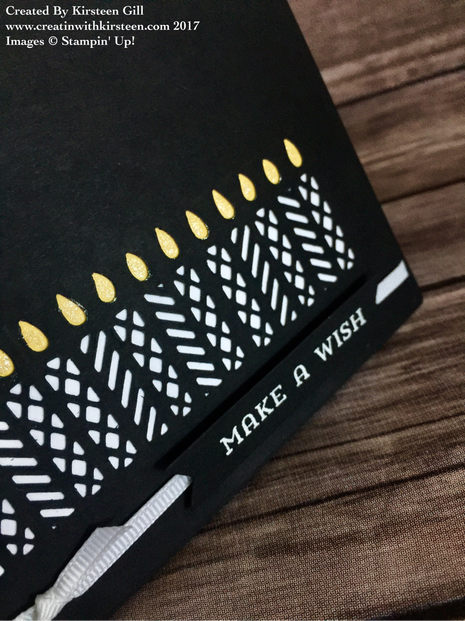
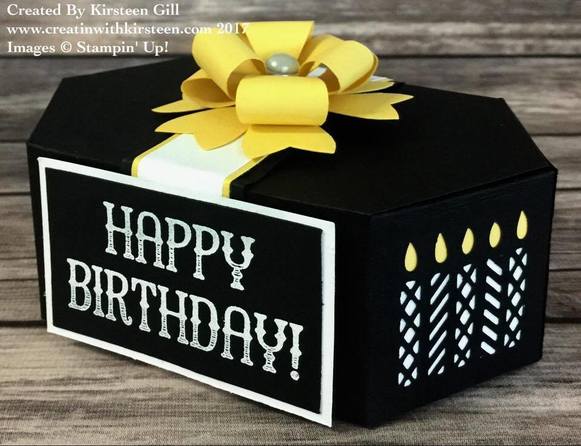
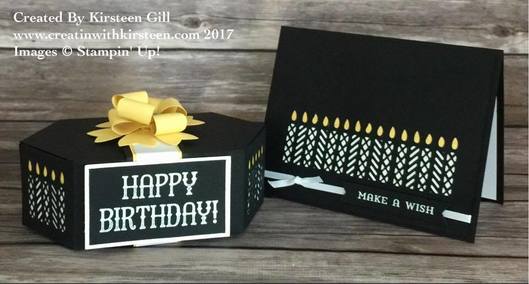
Nope - I've been using the Window Box framelits so much lately I decided to go with a birthday theme and use the candle thinlit on a card. Here's what I ended up with...
However this year I found inspiration when I was looking up some information on my daughter's school website-she attends SCAD and their mascot is the bee!
So I thought 'let's use yellow with black and white'....but then flowers? Bees?
Nope - I've been using the Window Box framelits so much lately I decided to go with a birthday theme and use the candle thinlit on a card. Here's what I ended up with...
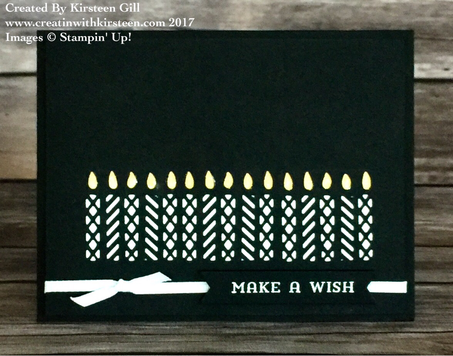
The sentiment is from the matching stamp set 'Window Shopping' and is stamped with versamark and heat embossed with white embossing powder. I have lots of the white ribbon left from the Sending Love ribbon combo (I used a lot of the red over the last few weeks) so I added a little under the sentiment and around the card to break up the black a little. You can't quite see but I added Wink of Stella to the 'flames' for a little bit of shimmer.
You can click on the thumbnails below to navigate through these photos showing how to make the top layer of the card.
As I said I've been playing a lot with the Window Box Framelits making it taller (you can find the tutorials HERE)...but then I thought - there must be a way to make it WIDER!!
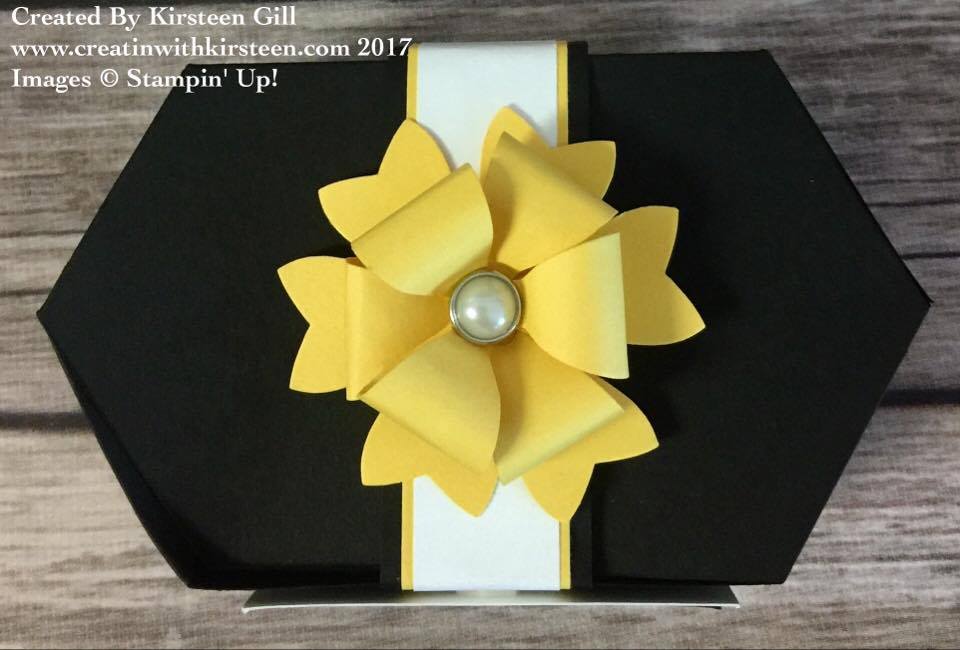
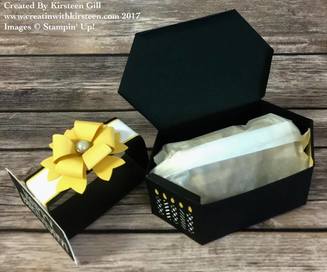
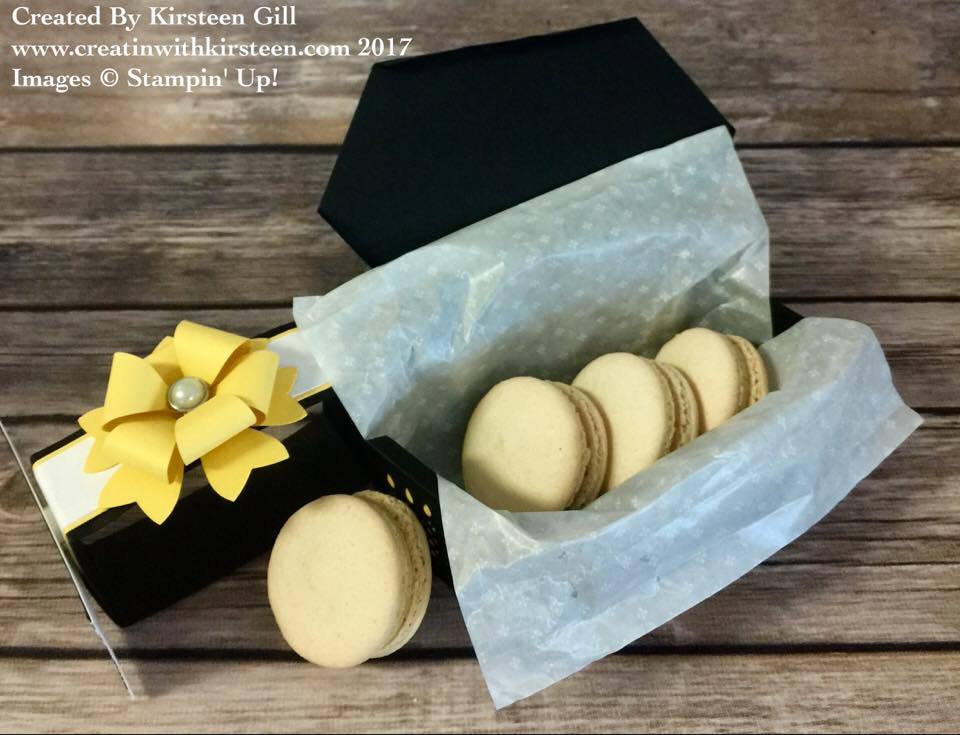
It turned out to be pretty easy to do. Here is the finished box...I added a belly band with a sentiment and bow using the Bow Builder Punch and it turned out to be the perfect size for a few macarons!
It turned out to be pretty easy to do. Here is the finished box...I added a belly band with a sentiment and bow using the Bow Builder Punch and it turned out to be the perfect size for a few macarons!

|
|
|
|
You can see the difference in size from the original to this extended size:
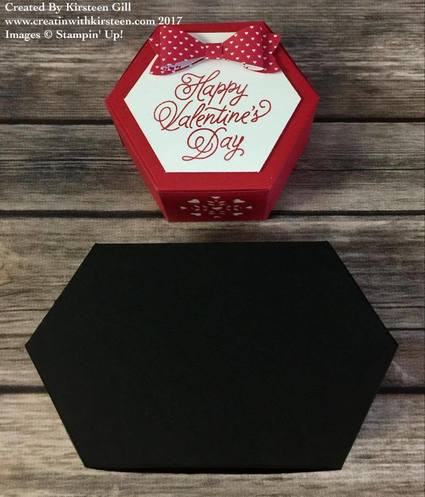
To make the double width box you need two pieces of 5 1/5" x 8 1/2" piece of black cardstock. You'll need to cut 2 before glueing them together.
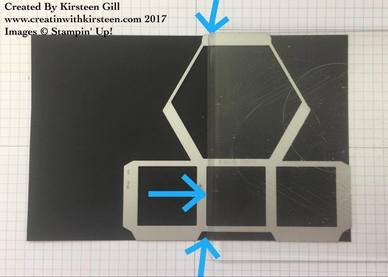
Line the edge of the thinlit with the edge of the card. Position the big shot top plate to the right side of the framelit with the edge aligned with the edge of the middle square as in the photo with the blue arrows. Then run through the big shot.
Now look for the score line on that far right square directly under the edge of the hexagon and fold over so it's more visible.
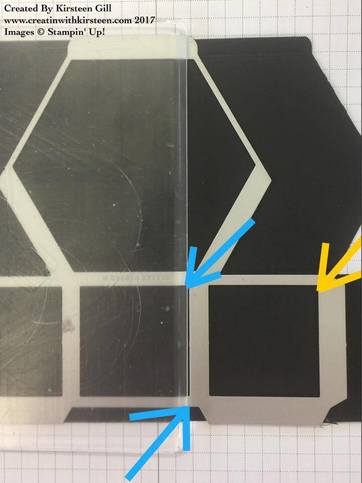
Move the framelit along so the far right of the right square is in line with the score line you just folded over mentioned above (the yellow arrow). Now place the top plate to the left of the framelit...and align the edge with the right edge of the middle square blue arrows) and run through the big shot
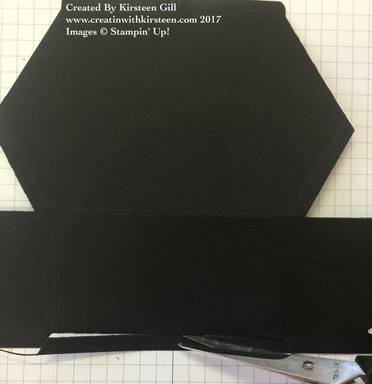
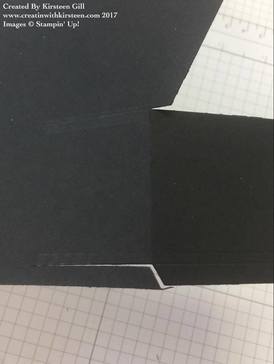
You'll need to trim the bottom middle as the framelit may well not have cut all the way along.
I am not going to show you how to assemble the box - Stampin' Up! have an excellent video showing how to do this :)
I hope you enjoyed your stop here! You can hop on along to Cindy's blog by clicking the 'Next' button or navigate through the hop using the links below.
I'm appreciative of your comments...please click below to leave one :)
I'm appreciative of your comments...please click below to leave one :)
Are you a Stampin' Up! Demo heading to Shreveport in April?
Would you like to attend my class? Click here for more information!
Would you like to attend my class? Click here for more information!


 RSS Feed