
I made this card last weekend and folk have been asking for a tutorial. I only took photos of the start of the process - then forgot to take some as the make progressed - but I think you will be able to get the idea. I have heard of folk using a magnet to create a slider - but sometimes mailing a card with a magnet can cause issues in mailing, so there are no magnets on this one.
As you pull the tab on one side of the slider the slider on the other side also pops out - and in this case the Raccoon slides across the card too.
Essentially this card is a double slider - and I have a tutorial for that on a previous post
CLICK HERE FOR THE DOUBLE SLIDER TUTORIAL
Here is how I added in the sliding Raccoon 😊
CLICK HERE FOR THE DOUBLE SLIDER TUTORIAL
Here is how I added in the sliding Raccoon 😊
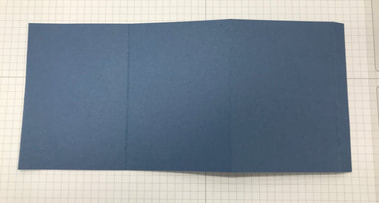
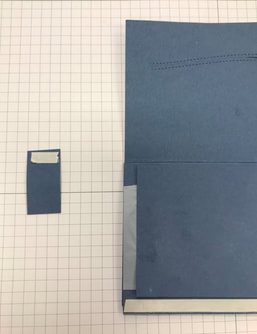
Cut your Cardstock base for the card and score as in the instructions. Line the card up in this orientation with the smallest score to the right.
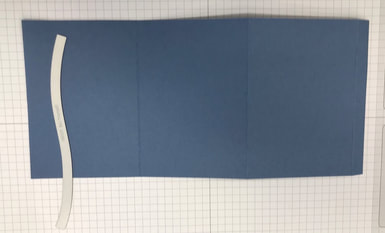
So - for this step it would obviously be easier if you had a knife and cut a line, or if you used a paper trimmer □ (I couldn't find my knife, and I didn't even think about using my trimmer at the time!) so I improvised and used a die from the Freezing' Fun Bundle. Position the die as you can see above, or cut your slit with a craft knife
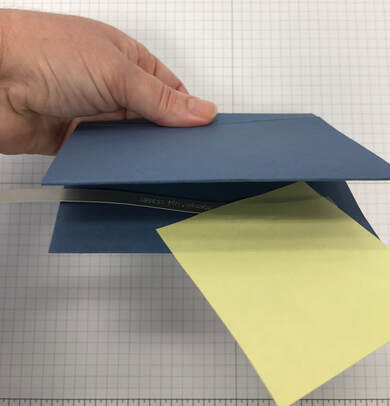
I used a post-it note to keep the die in place
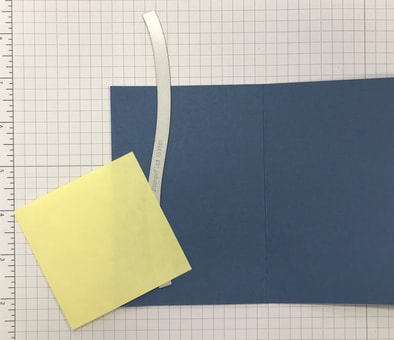
Fold the card over making sure the piece of card you want to cut is the only one under the die - everything else is folded on top
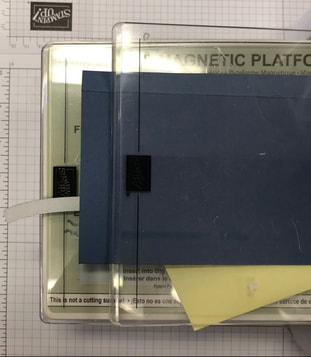
You don't want to cut the whole length of the die - or you'll cut off the edge of the card. So, position the top plate of your die cutting machine from the edge of the card - the machine will only cut where there is pressure from the top plate.
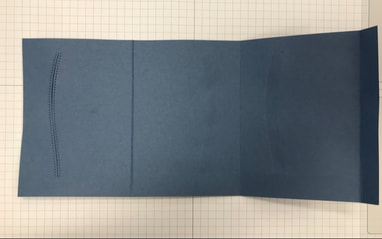
This is what your cut card will look like
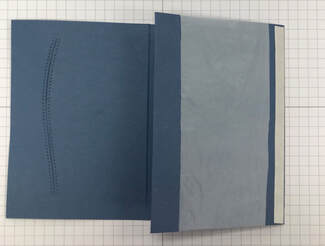 carry on assembling the card just as any other double slider |  |
Cut a small tab about 3/4" x 1 1/2" and add Tear Tape as in the picture
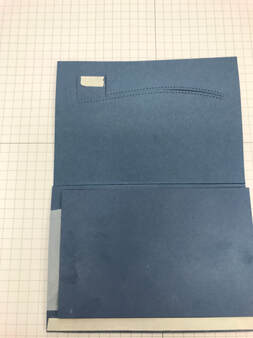
Push the tab in from behind and position to one side of the cut - if you have used the die you need to make sure the tape is ABOVE the top of any curve - you don't want it to catch on that as it slides. Remove the tape from the tab and the the score line, gently fold over the top of the card
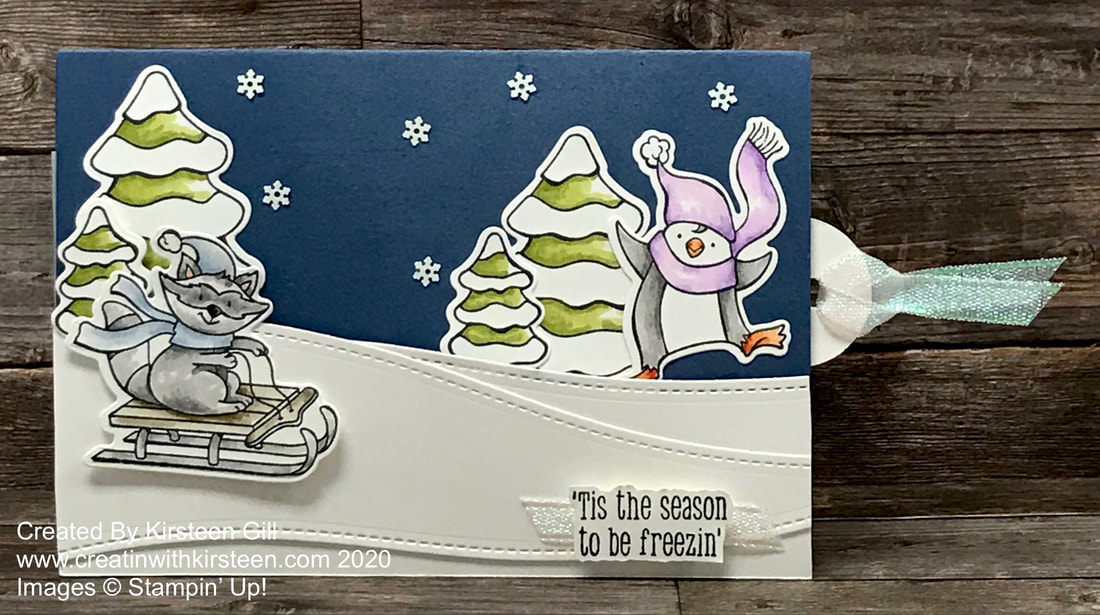
The red line shows where the cut and the tab are hidden behind the decoration / snow. Cut layers of 'snow' in Whisper White Cardstock and glue to the bottom of the card Below the level of the cut. Add stamped images behind the snow - but you have to make sure these are flat against the card and do not overlap the cut area. I then added a Stampin' Dimensional to the top of the tab and trimmed around it before sticking the raccoon to the tab. This holds the raccoon above the Cardstock snow layers and means he doesn't get caught as he slides.
I hope that helps you recreate this card - or use the idea for another slider.
I hope that helps you recreate this card - or use the idea for another slider.


 RSS Feed